I have used data source control many times and its great it provides us great features for declarative binding. LinqDataSource Control is a great control and it allows us to bind linq queries without writing any code declaratively. Let’s create a example in that example I am not going to write a single line of code and we are going to create view,Update and Delete functionality.
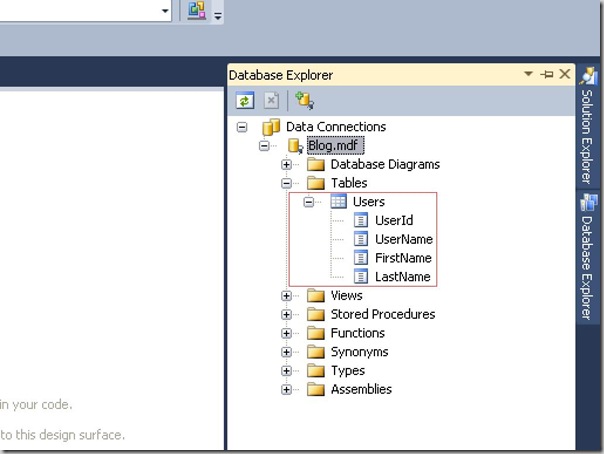
So first we need a table which will have data. So, I am going to use the same table which I have used in my old posts. Below is the table structure for this example.
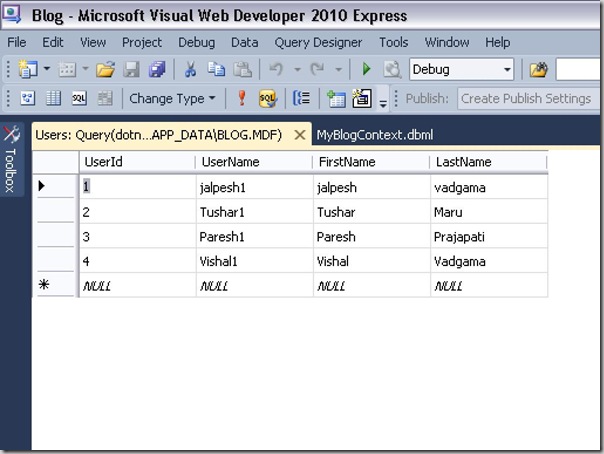
Let’s insert some data for that table structure. I have already inserted it in previous example. Just like below.
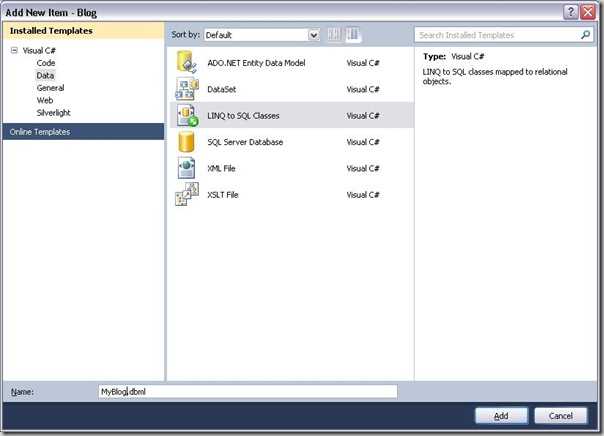
Now, To bind a linqdatasource we need a Linq-To-SQL Data context class Let’s create it via Project->Right Click->Add New Item –>Go to data tab->Linq-To-SQL classes Just like following.
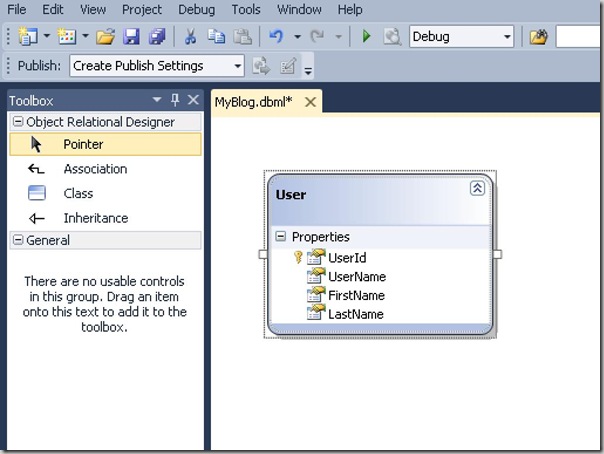
After that I have just dragged user data to my data context just like following.
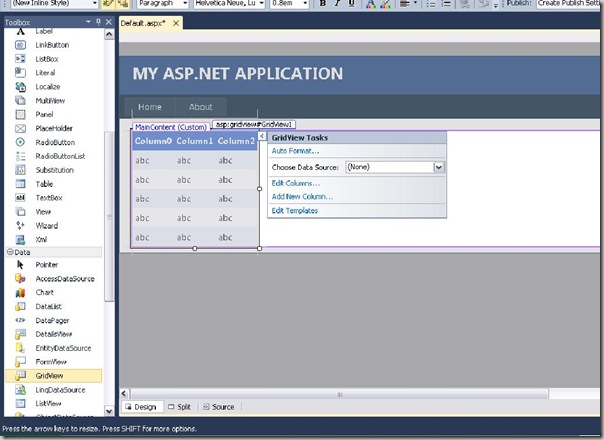
After creating Our Linq-To-SQL Classes Let’s just Add the A grid View control to my default.aspx page and apply some default format like this.
Now Let’s add a LinqDataSource from the toolbox like following.
Now select the data source and click configure data source as we can see as below.
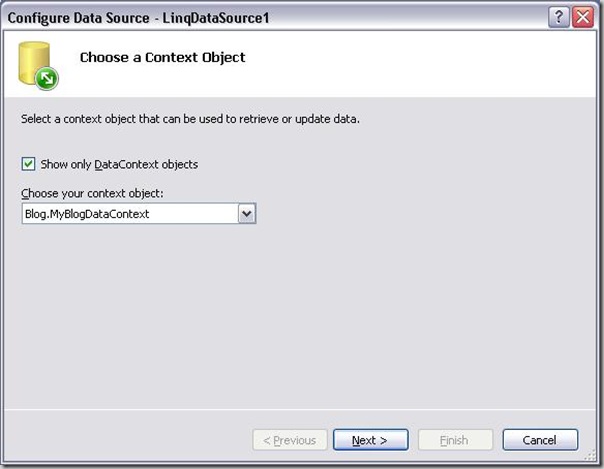
After clicking on the Configure Data source a wizard will appear which will allow us to select Linq-to-SQL Context class just like following.
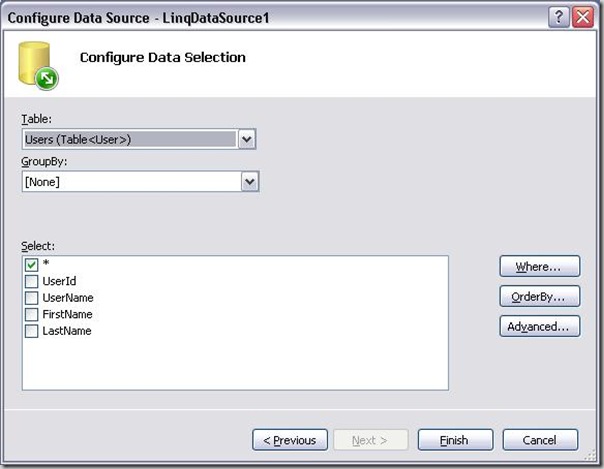
After clicking on next it will allow us to select the Linq-To-SQL Table. In our case it is a Users table so select user table just like following and select * for all columns.
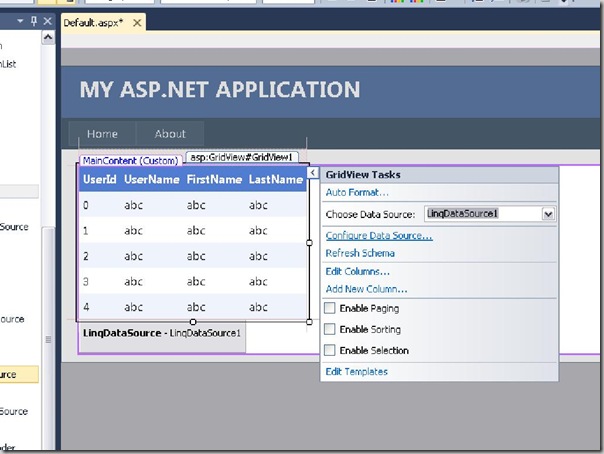
Click finish now our Linq Data Source is Ready Now select the grid view and select Linq Data source we just created like below.
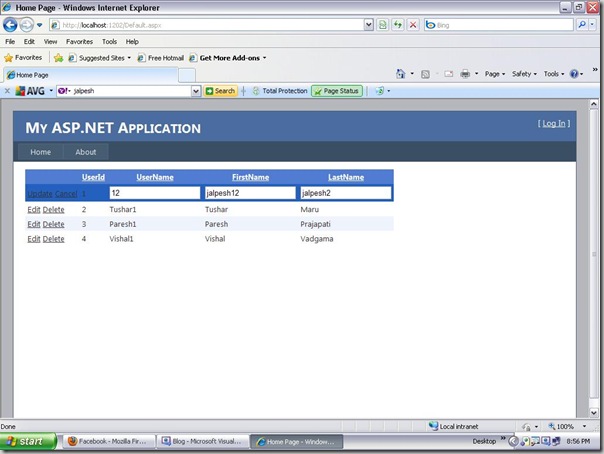
Now our grid view is ready We just need to select Enable Sorting and Enable Paging to give default sorting and paging functionality to grid view. Now do to aspx file and you will see that grid view control is created. I have set two more properties AutoGenerateDeleteButton and AutoGenerateEditButton property of grid view to true as we need to create update and delete functionality also. Just like below.
<asp:GridView ID="GridView1" runat="server" CellPadding="4" ForeColor="#333333"
GridLines="None" AllowPaging="True" AllowSorting="True"
AutoGenerateColumns="False" DataSourceID="LinqDataSource1"
AutoGenerateDeleteButton="True" AutoGenerateEditButton="True"
DataKeyNames="UserId" >
<AlternatingRowStyle BackColor="White" />
<Columns>
<asp:BoundField DataField="UserId" HeaderText="UserId"
SortExpression="UserId" ReadOnly="True" />
<asp:BoundField DataField="UserName" HeaderText="UserName"
SortExpression="UserName" />
<asp:BoundField DataField="FirstName" HeaderText="FirstName"
SortExpression="FirstName" />
<asp:BoundField DataField="LastName" HeaderText="LastName"
SortExpression="LastName" />
</Columns>
<EditRowStyle BackColor="#2461BF" />
<FooterStyle BackColor="#507CD1" Font-Bold="True"
ForeColor="White" />
<HeaderStyle BackColor="#507CD1" Font-Bold="True"
ForeColor="White" />
<PagerStyle BackColor="#2461BF" ForeColor="White"
HorizontalAlign="Center" />
<RowStyle BackColor="#EFF3FB" />
<SelectedRowStyle BackColor="#D1DDF1" Font-Bold="True"
ForeColor="#333333" />
<SortedAscendingCellStyle BackColor="#F5F7FB" />
<SortedAscendingHeaderStyle BackColor="#6D95E1" />
<SortedDescendingCellStyle BackColor="#E9EBEF" />
<SortedDescendingHeaderStyle BackColor="#4870BE" />
</asp:GridView>
<asp:LinqDataSource ID="LinqDataSource1" runat="server"
ContextTypeName="Blog.MyBlogDataContext"
EntityTypeName="" TableName="Users"
EnableDelete="True" EnableUpdate="True">
</asp:LinqDataSource>
So It’s very easy to create this kind of functionality. Hope this help you.. Happy Programming..




Excellent!!
ReplyDelete