Recently, I have been using Linux(Ubuntu) machine on my virtual box quite a bit and as Microsoft.NET Developer I want to install .NET Core on Ubuntu. So I tried following the instruction from below link to install .NET core on Ubuntu 16.04.
https://docs.microsoft.com/en-us/dotnet/core/linux-prerequisites?tabs=netcore2x
But I was not unable to install .NET Core and I was getting following errors.

I was a little bit curious about that and then I have read carefully the documentation mentioned on the above link and I have found that .NET Core require following require following Ubuntu distributions as Prerequisites.
Most of the time it should be installed by default with sudo apt-get update and sudo apt-get upgrade command but sometimes it does not. So what I did install all these distributions one by one via sudo apt-get install command and in my case, I was not having liblttng-ust0 distribution on my machine. So I have installed it via the following command.

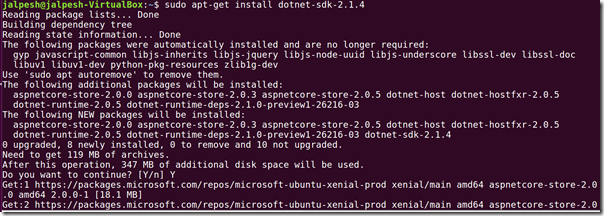
Then I was able to install .NET Core on my machine via following above link on documentation.

And now it’s running .NET Core v 2.1.4 on my Ubuntu VirtualBox as you can see it in below dotnet version command.

I was able to solve my problem this and so I thought it will be a good idea to share it on my blog so it will help people who are having the same problem.
Stay tuned for more there is a lot more coming for asp.net core and node.js on Linux on future blog posts.
https://docs.microsoft.com/en-us/dotnet/core/linux-prerequisites?tabs=netcore2x
But I was not unable to install .NET Core and I was getting following errors.
The following packages have unmet dependencies:You can see the same error in the following screenshot.
dotnet-sdk-2.1.4 : Depends: dotnet-runtime-2.0.5 but it is not going to be installed
E: Unable to correct problems, you have held broken packages.
I was a little bit curious about that and then I have read carefully the documentation mentioned on the above link and I have found that .NET Core require following require following Ubuntu distributions as Prerequisites.
- libunwind8
- liblttng-ust0
- libcurl3
- libssl1.0.0
- libuuid1
- libkrb5-3
- zlib1g
- libicu52 (for 14.X)
- libicu55 (for 16.X)
- libicu57 (for 17.X)
Most of the time it should be installed by default with sudo apt-get update and sudo apt-get upgrade command but sometimes it does not. So what I did install all these distributions one by one via sudo apt-get install command and in my case, I was not having liblttng-ust0 distribution on my machine. So I have installed it via the following command.
sudo apt-get install liblttng-ust0You can also see below screenshot for the same.
Then I was able to install .NET Core on my machine via following above link on documentation.
And now it’s running .NET Core v 2.1.4 on my Ubuntu VirtualBox as you can see it in below dotnet version command.
I was able to solve my problem this and so I thought it will be a good idea to share it on my blog so it will help people who are having the same problem.
Stay tuned for more there is a lot more coming for asp.net core and node.js on Linux on future blog posts.

