In one of our project we have requirement of maintaining history of Ajax events. After doing some search on the web I have found one interesting capabilities of Script Manager control. I have found that there is one property called “EnableHistory” which will enable history for all the Ajax Event for which you have created the History Point. So Let’s first take a simple example with Ajax Tab and we are maintaining history of tab Navigation. To add the Ajax tab we first need the AjaxToolKit. So I have download the AjaxToolKit and Added Reference to my project like below.
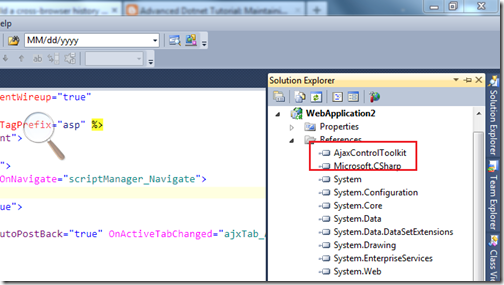
Once I have done with adding reference I have written some asp.net HTML code to create Three tab and Also added a script manager like following which Enable history =”true” property and Navigate event. Like following.
Here in the above Code I have created Three tabs Home,About us and Contact us and I have putted that in update panel and Also I have enabled “Autopostback” to true so whenever tab will be changed it will post back the page. So now let us do the server side part. Here I have written code in two events. First one is from the script manager navigate event which will fire when we navigate pages thorough browser history and another one is the ActiveTabChanged event which will fire when we change Tab. In Script manager navigate I have written code to select tab based on the state from navigate event. In ActiveTabchanged event I have written code to create navigation history point which will register that in browser history. Following is the code for that.
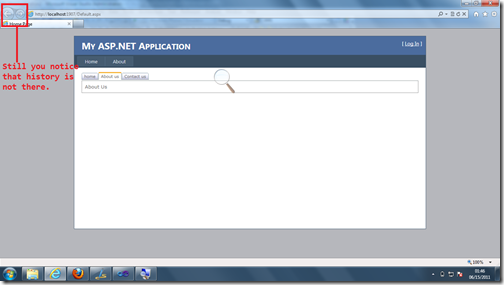
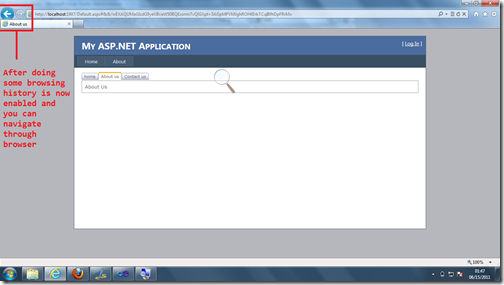
Now once you browse page with some tab you can see history is enabled in browser and you can go back and forward with browser navigations like following.
So that’s it. Isn’t that cool? Stay tuned for more.. Hope you liked it. Till that Happy programming.


Once I have done with adding reference I have written some asp.net HTML code to create Three tab and Also added a script manager like following which Enable history =”true” property and Navigate event. Like following.
<%@ Page Title="Home Page" Language="C#" MasterPageFile="~/Site.master" AutoEventWireup="true"
 CodeBehind="Default.aspx.cs" Inherits="WebApplication2._Default" %>
 <%@ Register Assembly="AjaxControlToolkit" Namespace="AjaxControlToolkit" TagPrefix="asp" %>
<asp:Content ID="HeaderContent" runat="server" ContentPlaceHolderID="HeadContent">
</asp:Content>
<asp:Content ID="BodyContent" runat="server" ContentPlaceHolderID="MainContent">
 <asp:ScriptManager id="scriptManager" runat="server" EnableHistory="true" OnNavigate="scriptManager_Navigate">
 </asp:ScriptManager>
 <asp:UpdatePanel ID="updatePanelTab" runat="server" ChildrenAsTriggers="true">
     <ContentTemplate>
         <asp:TabContainer ID="ajxTab" runat="server" ActiveTabIndex="0"  AutoPostBack="true" OnActiveTabChanged="ajxTab_ActiveTabChanged">
 <asp:TabPanel ID="homTab" runat="server" HeaderText="home" >
                     <ContentTemplate>
                         Home
                     </ContentTemplate>
 </asp:TabPanel>
  <asp:TabPanel ID="aboutUsTab" runat="server" HeaderText="About us" >
                     <ContentTemplate>
                         About Us
                     </ContentTemplate>
 </asp:TabPanel>
  <asp:TabPanel ID="contactUsTab" runat="server" HeaderText="Contact us" >
                     <ContentTemplate>
                         Contact us
                     </ContentTemplate>
 </asp:TabPanel>
 </asp:TabContainer>
     </ContentTemplate>
 </asp:UpdatePanel>

</asp:Content>
Here in the above Code I have created Three tabs Home,About us and Contact us and I have putted that in update panel and Also I have enabled “Autopostback” to true so whenever tab will be changed it will post back the page. So now let us do the server side part. Here I have written code in two events. First one is from the script manager navigate event which will fire when we navigate pages thorough browser history and another one is the ActiveTabChanged event which will fire when we change Tab. In Script manager navigate I have written code to select tab based on the state from navigate event. In ActiveTabchanged event I have written code to create navigation history point which will register that in browser history. Following is the code for that.
using System;
using System.Web.UI;

namespace WebApplication2
{
 public partial class _Default : System.Web.UI.Page
 {
     protected void scriptManager_Navigate(object sender, HistoryEventArgs e)
     {
         string state = e.State["historyPoint"];
         ajxTab.ActiveTabIndex = Convert.ToInt32(state);
     }

     protected void ajxTab_ActiveTabChanged(object sender, EventArgs e)
     {
        if(scriptManager.IsInAsyncPostBack && !scriptManager.IsNavigating)
        {
            scriptManager.AddHistoryPoint("historyPoint",ajxTab.ActiveTabIndex.ToString(),ajxTab.ActiveTab.HeaderText);
        }
     }
 }
}
So code is completed now lets run the application and Check it in browser. It will be loaded like below.
Now once you browse page with some tab you can see history is enabled in browser and you can go back and forward with browser navigations like following.

So that’s it. Isn’t that cool? Stay tuned for more.. Hope you liked it. Till that Happy programming.

