Today I have downloaded the SQL Server 2011 CTP and I am very excited about the new features provided by it. I am going to post new features of the SQL Server 2011(Denali) CTP in future post. Today I am going to post about how install SQL Server 2011(Denali) CTP on Windows7 machine.
First you need to download the SQL Server 2001(Denali) CTP setup from the following URL. You need download the setup as per your operating system version 32bit or 64 bit version.
http://www.microsoft.com/downloads/en/details.aspx?FamilyID=6a04f16f-f6be-4f92-9c92-f7e5677d91f9
After once you download the setup. You need to extract files to a location and from that you have to click setup.exe. After clicking on setup.exe first screen will appear like following.
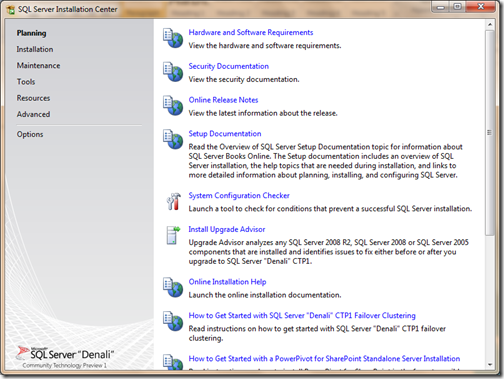
Once this screen appear you need to click on installation. Once you click the Installation following screen will appear.
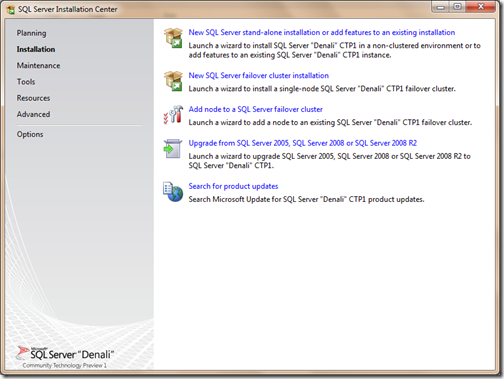
Above screen will give you few options about installing SQL Server. As I want to install Stand Alone installation I have clicked on Stand alone installation. After that it will perform several test like system requirement and other stuff and then if successfully passed all the test then following screen will appear.
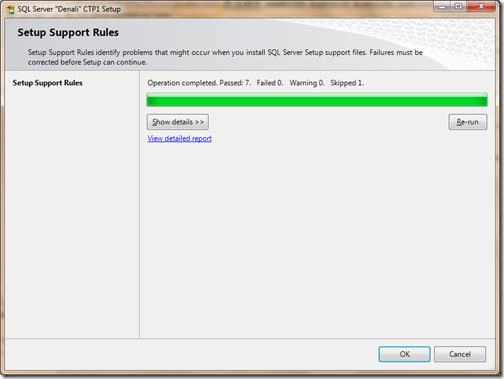
Then Click OK to continue to setup. Then following screen will appear.
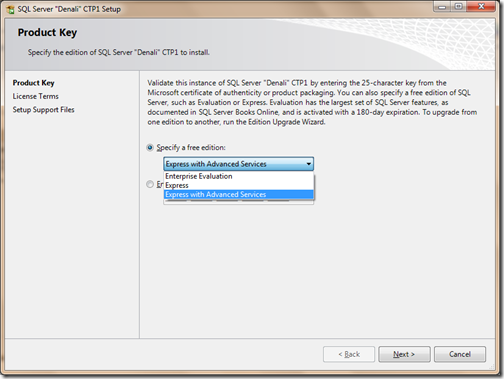
As I want to install the express edition I have selected the express with advance service. After that terms and conditions screen Like following will appear.
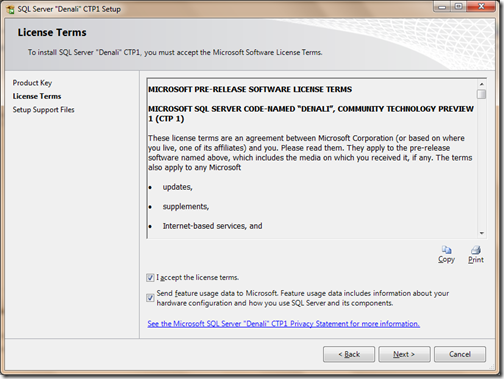
Accept the licence terms and then click Next and Install. It will start installing the it. After that it will checked about rules and will bring following screen.
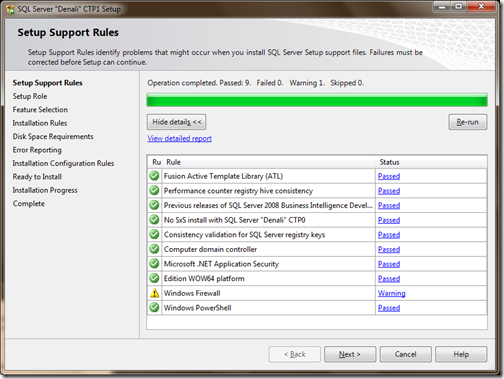
Click on Next and then you select the checkbox for SQL Server features and then following screen will appear.
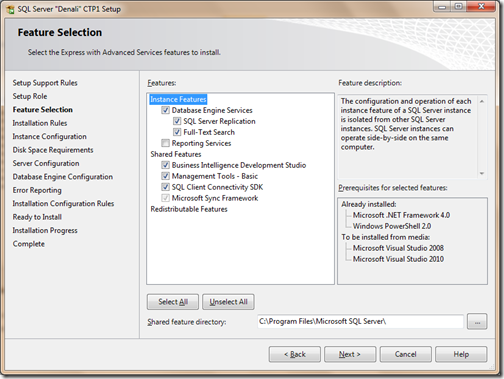
Select the features you wan to install then click next then following screen will appear.
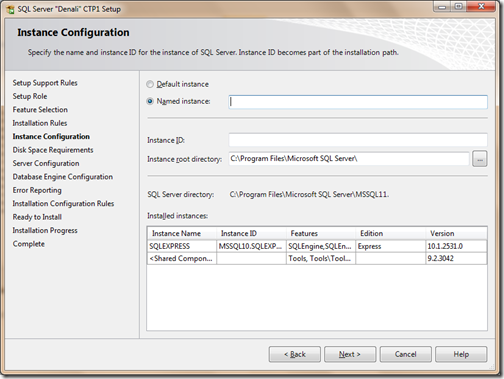
As I have to install default instance I have selected default instance and then click next. Then again one validation screen will appear you need to click next on that and then service account screen will appear you need to select the account via clicking on Use the same service account for SQL Server services like following.
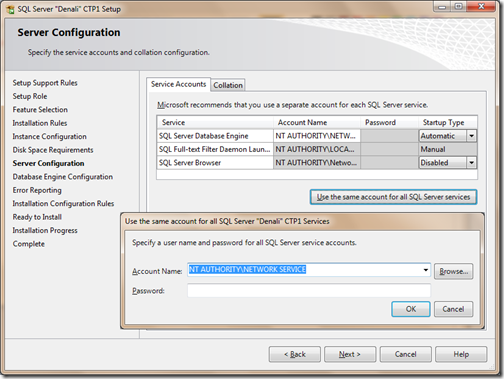
Once you are done click next and then SQL Server Authentication mode screen will appear like following.
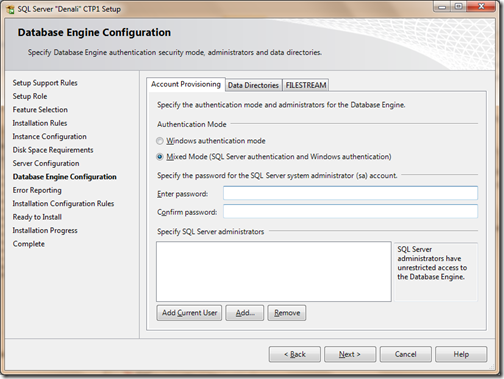
As I have to select mixed mode which will allow both windows authentication as well normal sql server account. Click on Next there will be several screens which are there for validation once you click next next and then Install it will start installing the SQL Server. Once you are dong with installing SQL Server following screen will appear.
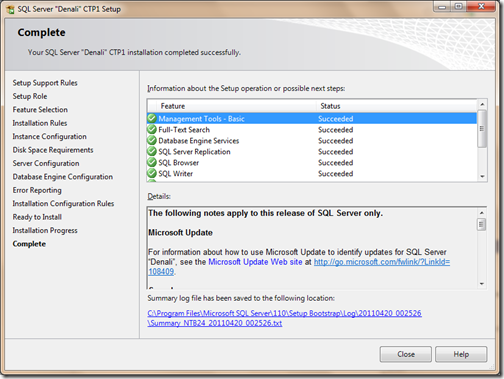
That’s it You have installed SQL Serve 2011 Denali!!. Hope you liked it. Stay tuned for more..

First you need to download the SQL Server 2001(Denali) CTP setup from the following URL. You need download the setup as per your operating system version 32bit or 64 bit version.
http://www.microsoft.com/downloads/en/details.aspx?FamilyID=6a04f16f-f6be-4f92-9c92-f7e5677d91f9
After once you download the setup. You need to extract files to a location and from that you have to click setup.exe. After clicking on setup.exe first screen will appear like following.

Once this screen appear you need to click on installation. Once you click the Installation following screen will appear.

Above screen will give you few options about installing SQL Server. As I want to install Stand Alone installation I have clicked on Stand alone installation. After that it will perform several test like system requirement and other stuff and then if successfully passed all the test then following screen will appear.

Then Click OK to continue to setup. Then following screen will appear.

As I want to install the express edition I have selected the express with advance service. After that terms and conditions screen Like following will appear.

Accept the licence terms and then click Next and Install. It will start installing the it. After that it will checked about rules and will bring following screen.

Click on Next and then you select the checkbox for SQL Server features and then following screen will appear.

Select the features you wan to install then click next then following screen will appear.

As I have to install default instance I have selected default instance and then click next. Then again one validation screen will appear you need to click next on that and then service account screen will appear you need to select the account via clicking on Use the same service account for SQL Server services like following.

Once you are done click next and then SQL Server Authentication mode screen will appear like following.

As I have to select mixed mode which will allow both windows authentication as well normal sql server account. Click on Next there will be several screens which are there for validation once you click next next and then Install it will start installing the SQL Server. Once you are dong with installing SQL Server following screen will appear.

That’s it You have installed SQL Serve 2011 Denali!!. Hope you liked it. Stay tuned for more..



0 comments:
Post a Comment
Your feedback is very important to me. Please provide your feedback via putting comments.